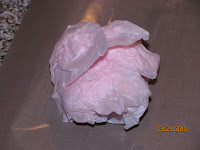
Supplies you need: tissue paper, mod podge (glossy), personal trimmer, twinkling waters water color paints, paint brush. Optional items include rubber stamp, ink and any embellishments you may want to use.
Step 1: Cut out piece of CS, this will be the layer you use on top of your base CS, so plan accordingly. I made an A2 (4.25 x 5.5) card, so my 2nd layer CS is cut to 4 x 5.25. Step 2: spread Mod Podge all over your piece of CS.

Step 4: Spread out uncrinkled tissue paper on top of Mod Podge. Make sure it sticks well - you can always add extra Mod Podge to CS or even on top of tissue if tissue rips.
 Step 5: Paint on top of wet tissue paper with Twinkling H2Os water colors. Twinkling H2Os have a metallic appearance when they dry. Now, let your creation dry. I usually use this time to work on coloring my image.
 After your background is dry, Step 6 (optional): stamp a decorative image onto the tissue paper. I chose this SU stamp of small circles which make a larger circle. You want to choose something fairly simple so that your main image will still be the focal point of your card. Since I used a purple-y color on the tissue, I chose gold metallic to do the image. You are best off using one base color and one metallic color (silver, gold, etc.) to give the most depth to the background.
Ok, so now you're ready for Step 8: Mount your background on your base CS. I love the way this looks!! What dio you think?

Finally, it's time to add your image and embellish as desired. For my image I used Bugaboo Stamps Charlotte in the Tub. LOVE this image!! I paper pieced the tub using SEI DP. My CS for the card is SU rich razzleberry and Bazzill textured pink. Image printed on GP 110 white. I did the bubbles in and around the tub with cotton candy Stickles and the individual bubbles are colored with atyou spicas. Image is colored with Copics - hair E35, 37 + Atyou spica brown; skin E02; Martini and glass YG00, Y02, YG03, YG 95 plus atyou spica yellow. Bling is Darice. As always, thanks for looking and hope this provides you with some inspiration:)
 For my image I used Bugaboo Stamps Charlotte in the Tub. LOVE this image!! I paper pieced the tub using SEI DP. My CS for the card is SU rich razzleberry and Bazzill textured pink. Image printed on GP 110 white. I did the bubbles in and around the tub with cotton candy Stickles and the individual bubbles are colored with atyou spicas. Image is colored with Copics - hair E35, 37 + Atyou spica brown; skin E02; Martini and glass YG00, Y02, YG03, YG 95 plus atyou spica yellow. Bling is Darice. As always, thanks for looking and hope this provides you with some inspiration:)


9 comments:
very cool tutorial Audrey! Love the card too!
Great tutorial Audrey! I think I'm going to try this on my next card! Thanks so much!
OMG - Your tutorial rocks!!! Very, very cool!!! One of these days I might actually get brave enough to try it. . .;)
Great tutorial Audrey will definately try this one.Thanks
xx Vee
Fabulous tutorial! Your card is adorable!
Hugs & Happy Days!
Min
Great card, Audrey! Love your tutorial!
Fantastic Audrey,a fabulous tutorial and a beautiful card!!!
xx
Great tutorial Audrey, I'll have to give it a try!
Nice tutorial. Thank you for sharing.
Post a Comment